I fixed a samsung microwave ! And it actually worked ! All that was needed were a few diodes to stop the LCD screen leaking current.
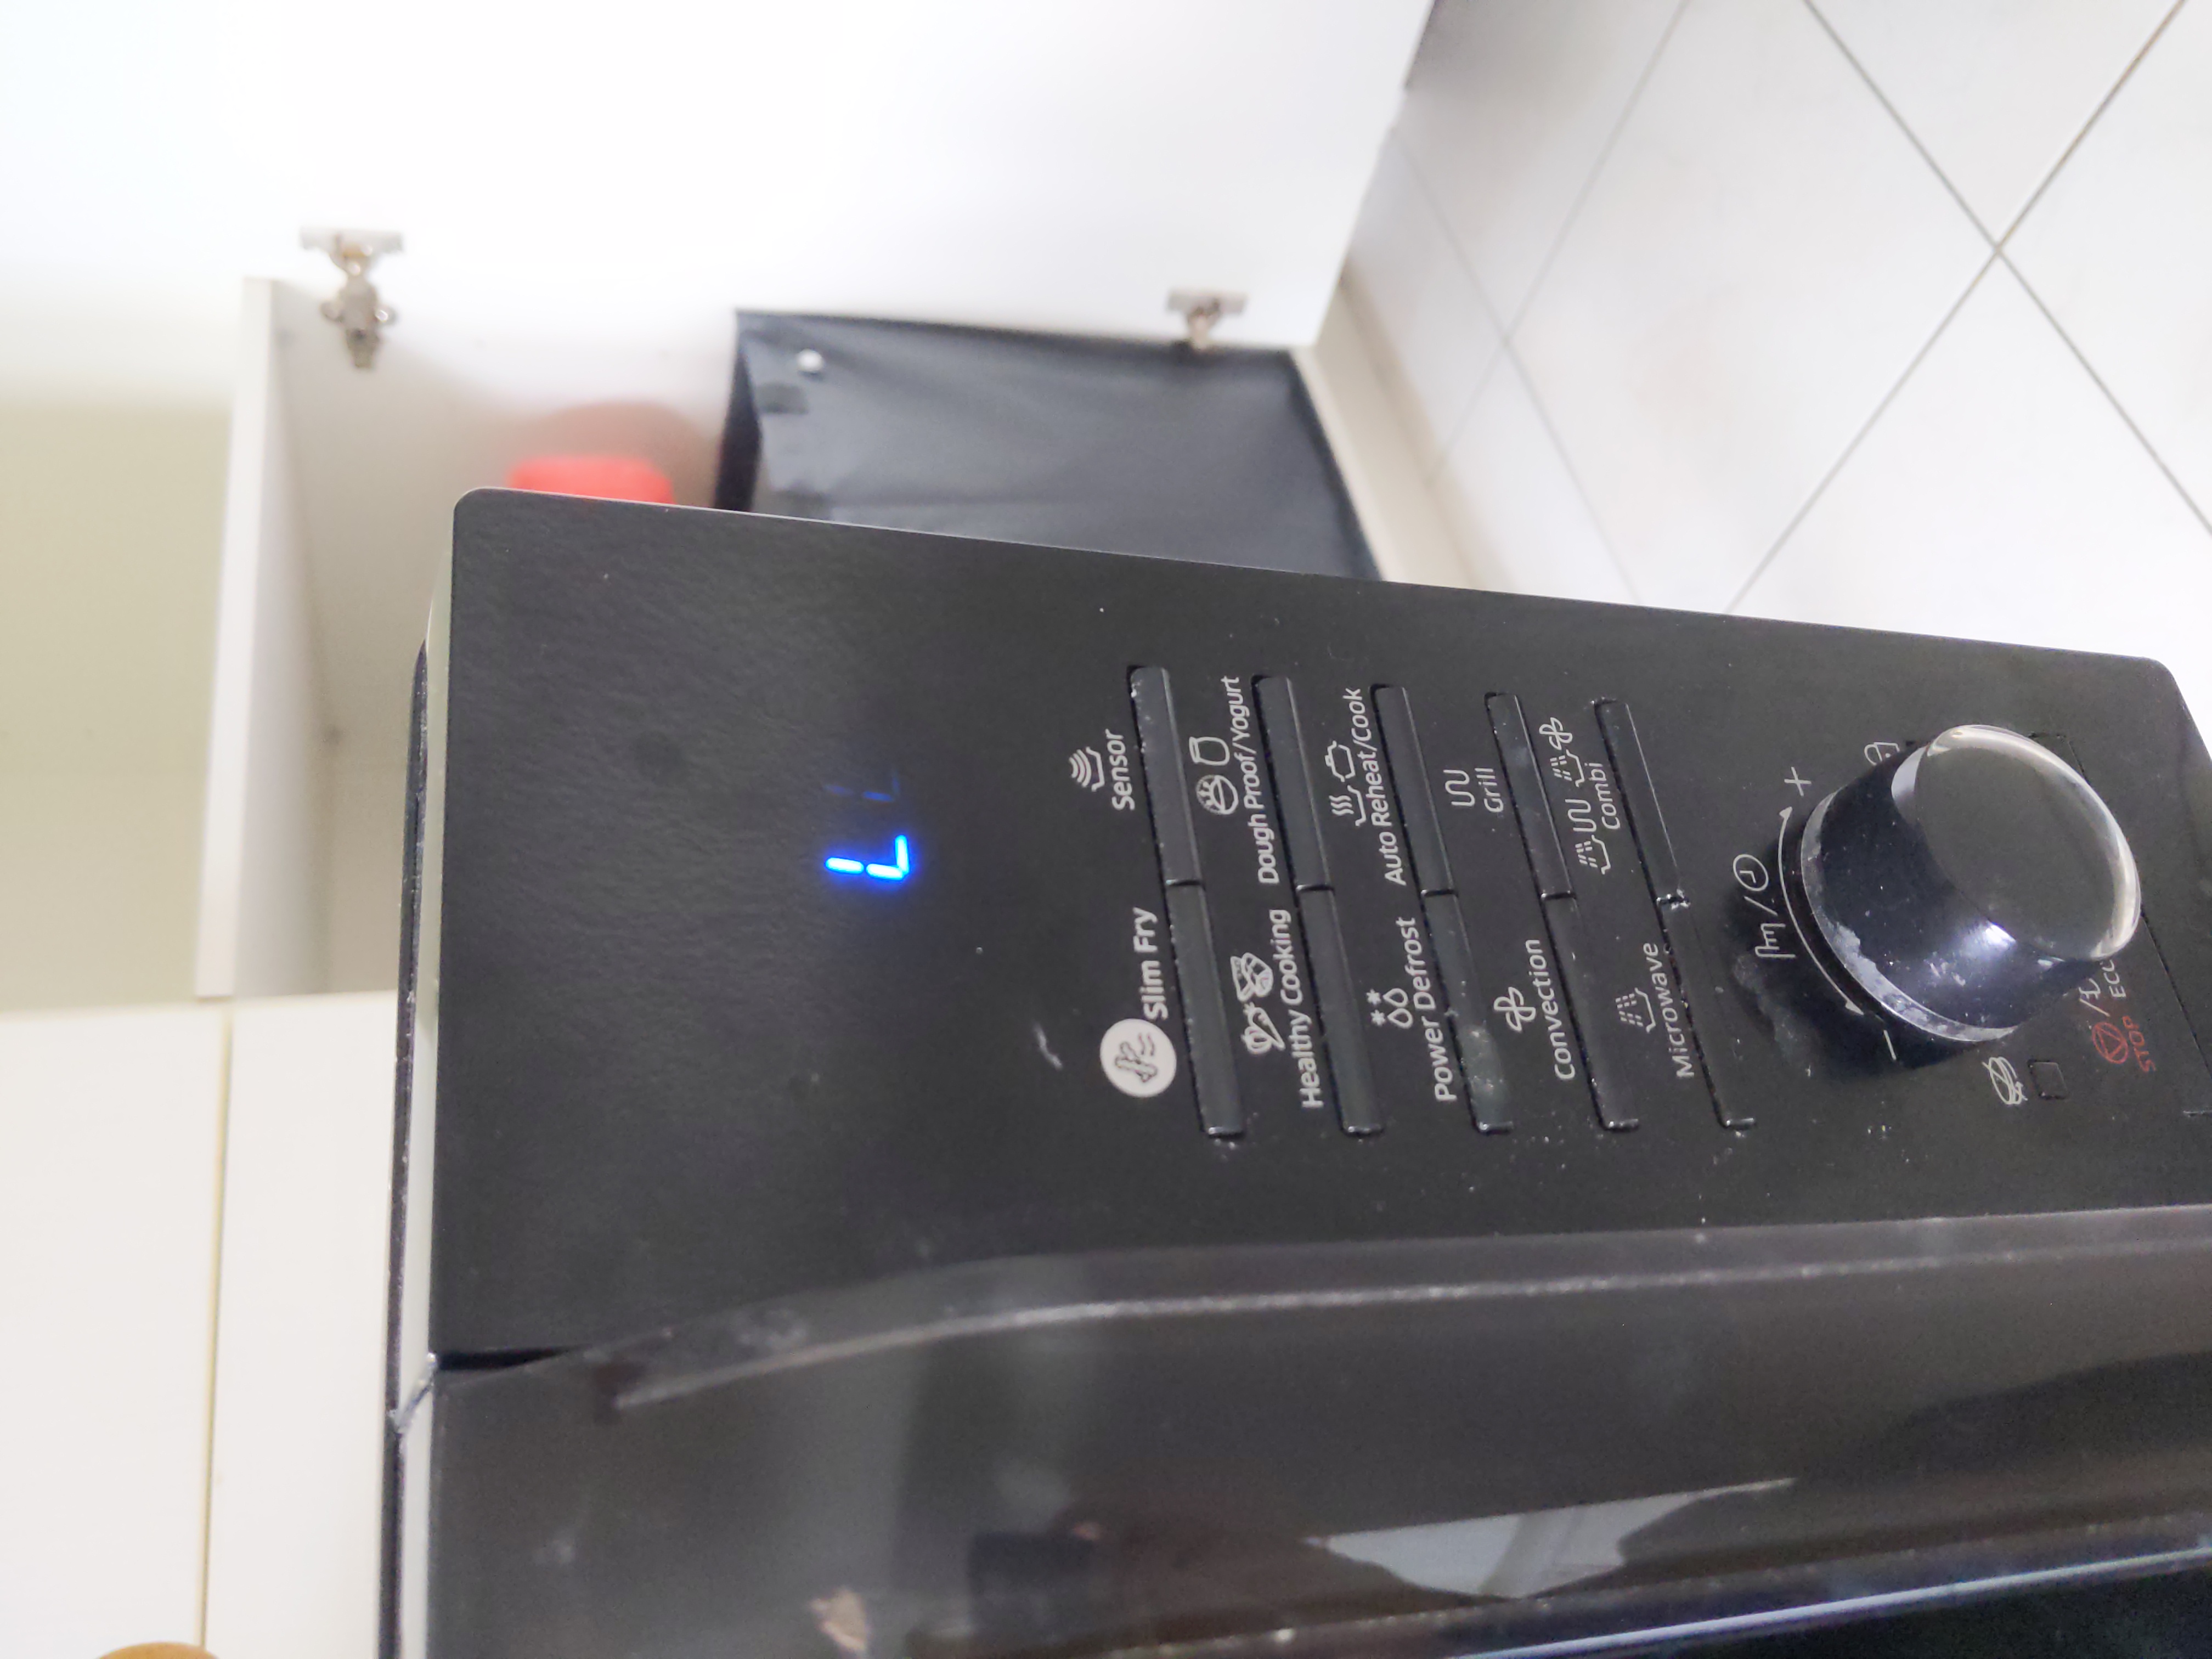
The tip-off that the problem was with the LCD screen was the fading of characteers on the screen. In the picture below, the microwave is put into child lock mode by holding the lock button. Only a single L should be lit, but you can see a second faded one to the right of the first.
This wasn't an issue by itself, but certain button presses were not registering correctly. In particular the start button. I found out it's rather tricky to use a microwave if the start button doesn't do anything. At times this was very frustrating because it behaved like a bad contact. If the button was pressed enough times it would eventually register a press and work as intended. I initially thought this was a problem with the button membrane actually, only to find out the LCD unit was the culprit when looking online.
Other people have had this problem too, and luckily for me, have documented what they did and shared it. I essentially combined two video guides: https://youtube.com/watch?v=fd8QbhdXvrQ and https://youtube.com/watch?v=ajpXjZZqsFk. The problem seems to be that the LCD screen leaks some current out of some pins. The quick fix is to add some diodes (IN4148 or 1N5711, I happened to already have some of the first) to these pins to stop this leakage and ensure currenty only flows in the correct direction. The two guides differ a bit as to which pins are soldered, which model of diode is used and how they're soldered. I basically followed the first guide, but used the soldering method of the second guide because it seemed easier, see further down below.
I also had a brief look at replacement LCD screens. But these seemed difficult to source or too expensive compared to a new or second hand microwave. The soldering iron and diodes were already laying and so were essentialy free.
I think I actually just (carefully) winged this. Can't remember as it was some time ago. Although be careful !!! there's one component that stores quite a lot of energy. So it's best to unplug the microwave first and let it sit at least a good hour or more to be sure it's completely discharged. At least that's what I understood while searching, and didn't get zapped.
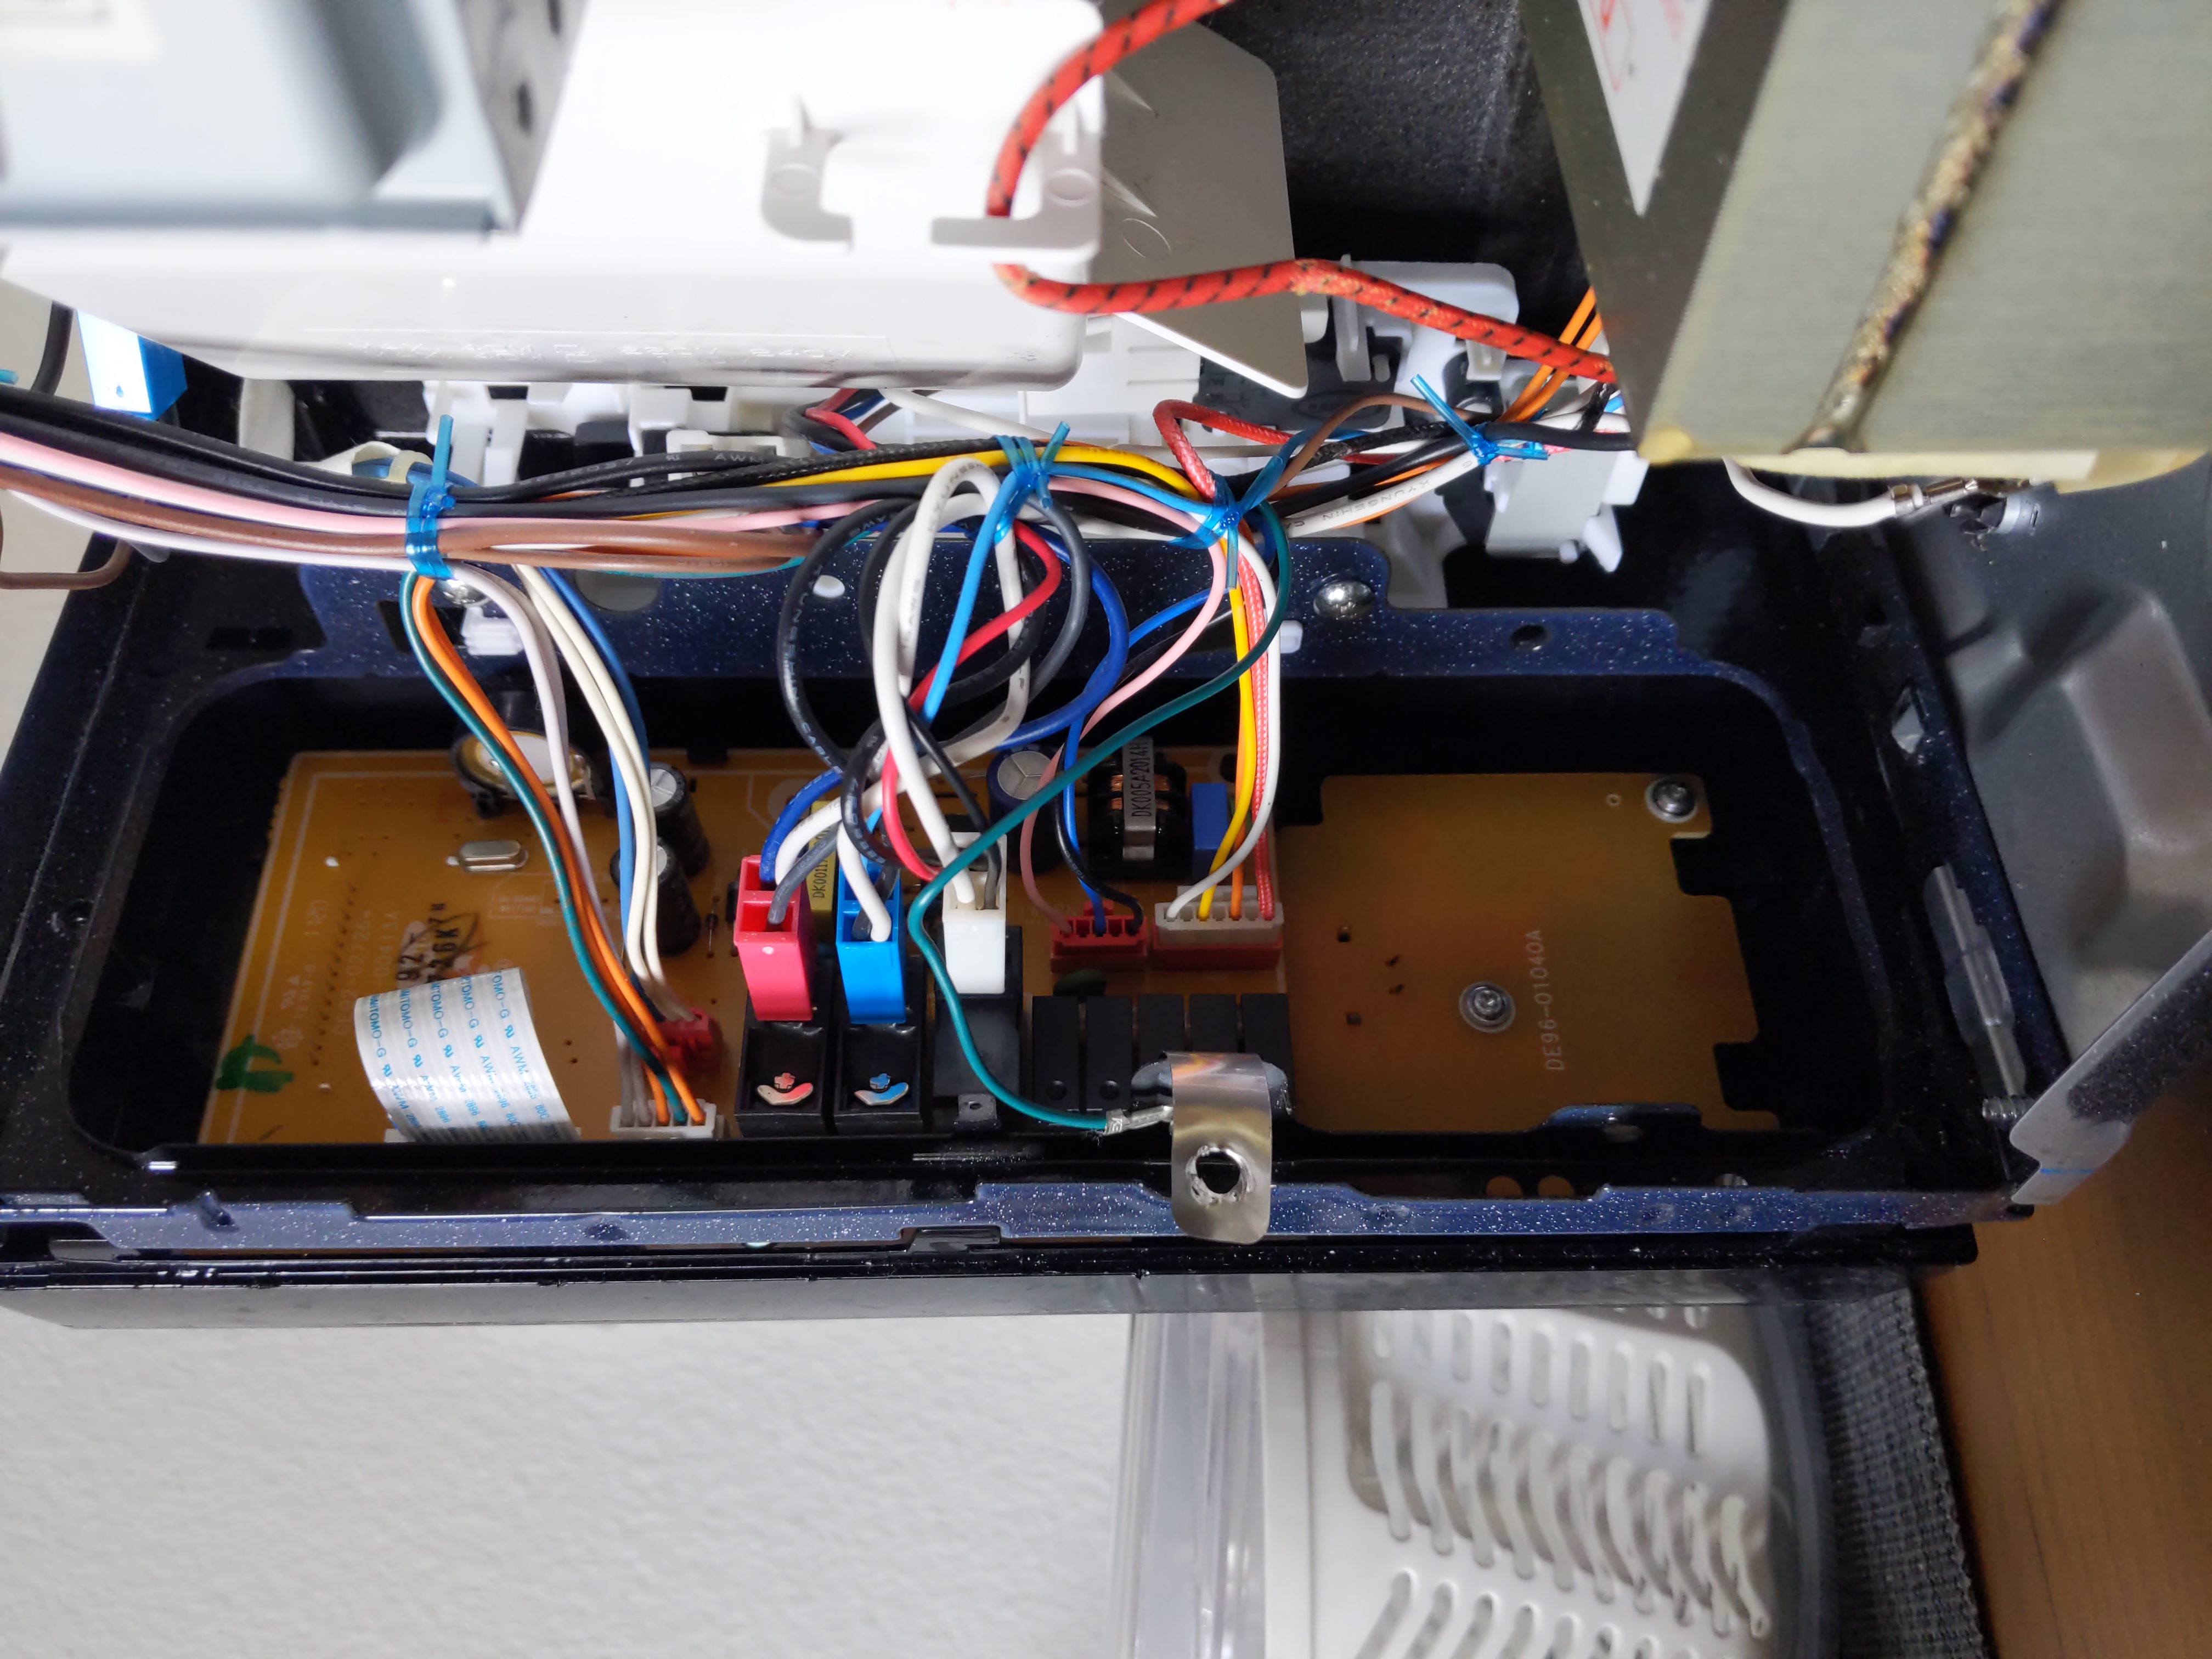
Always a good idea to snap a picture of how everything is plugged in before
disconnecting everything.
The entire board needs to come out of the microwave to have access to the LCD screen and its pins.
The soldering went pretty smoothly once I got the legs of each diode into the right shape and length. I basically cut the LCD pins at their base, close to the board just before the blob of solder. Then I bent these out to make it easier to solder the diodes to. I then bent the legs of the diode to form a U shape, so I could use tweezers on the body of the diode to hold it in place while soldering. The legs needed to be cut to the right length, which I did by holding them in place first before soldering, and making a few adjustments until the length was good.
I was initially worried about soldering the diode leg directly to the pin of the LCD, but this turned out to work really well. The solder just flowed along and between the LCD pin and diode leg really well

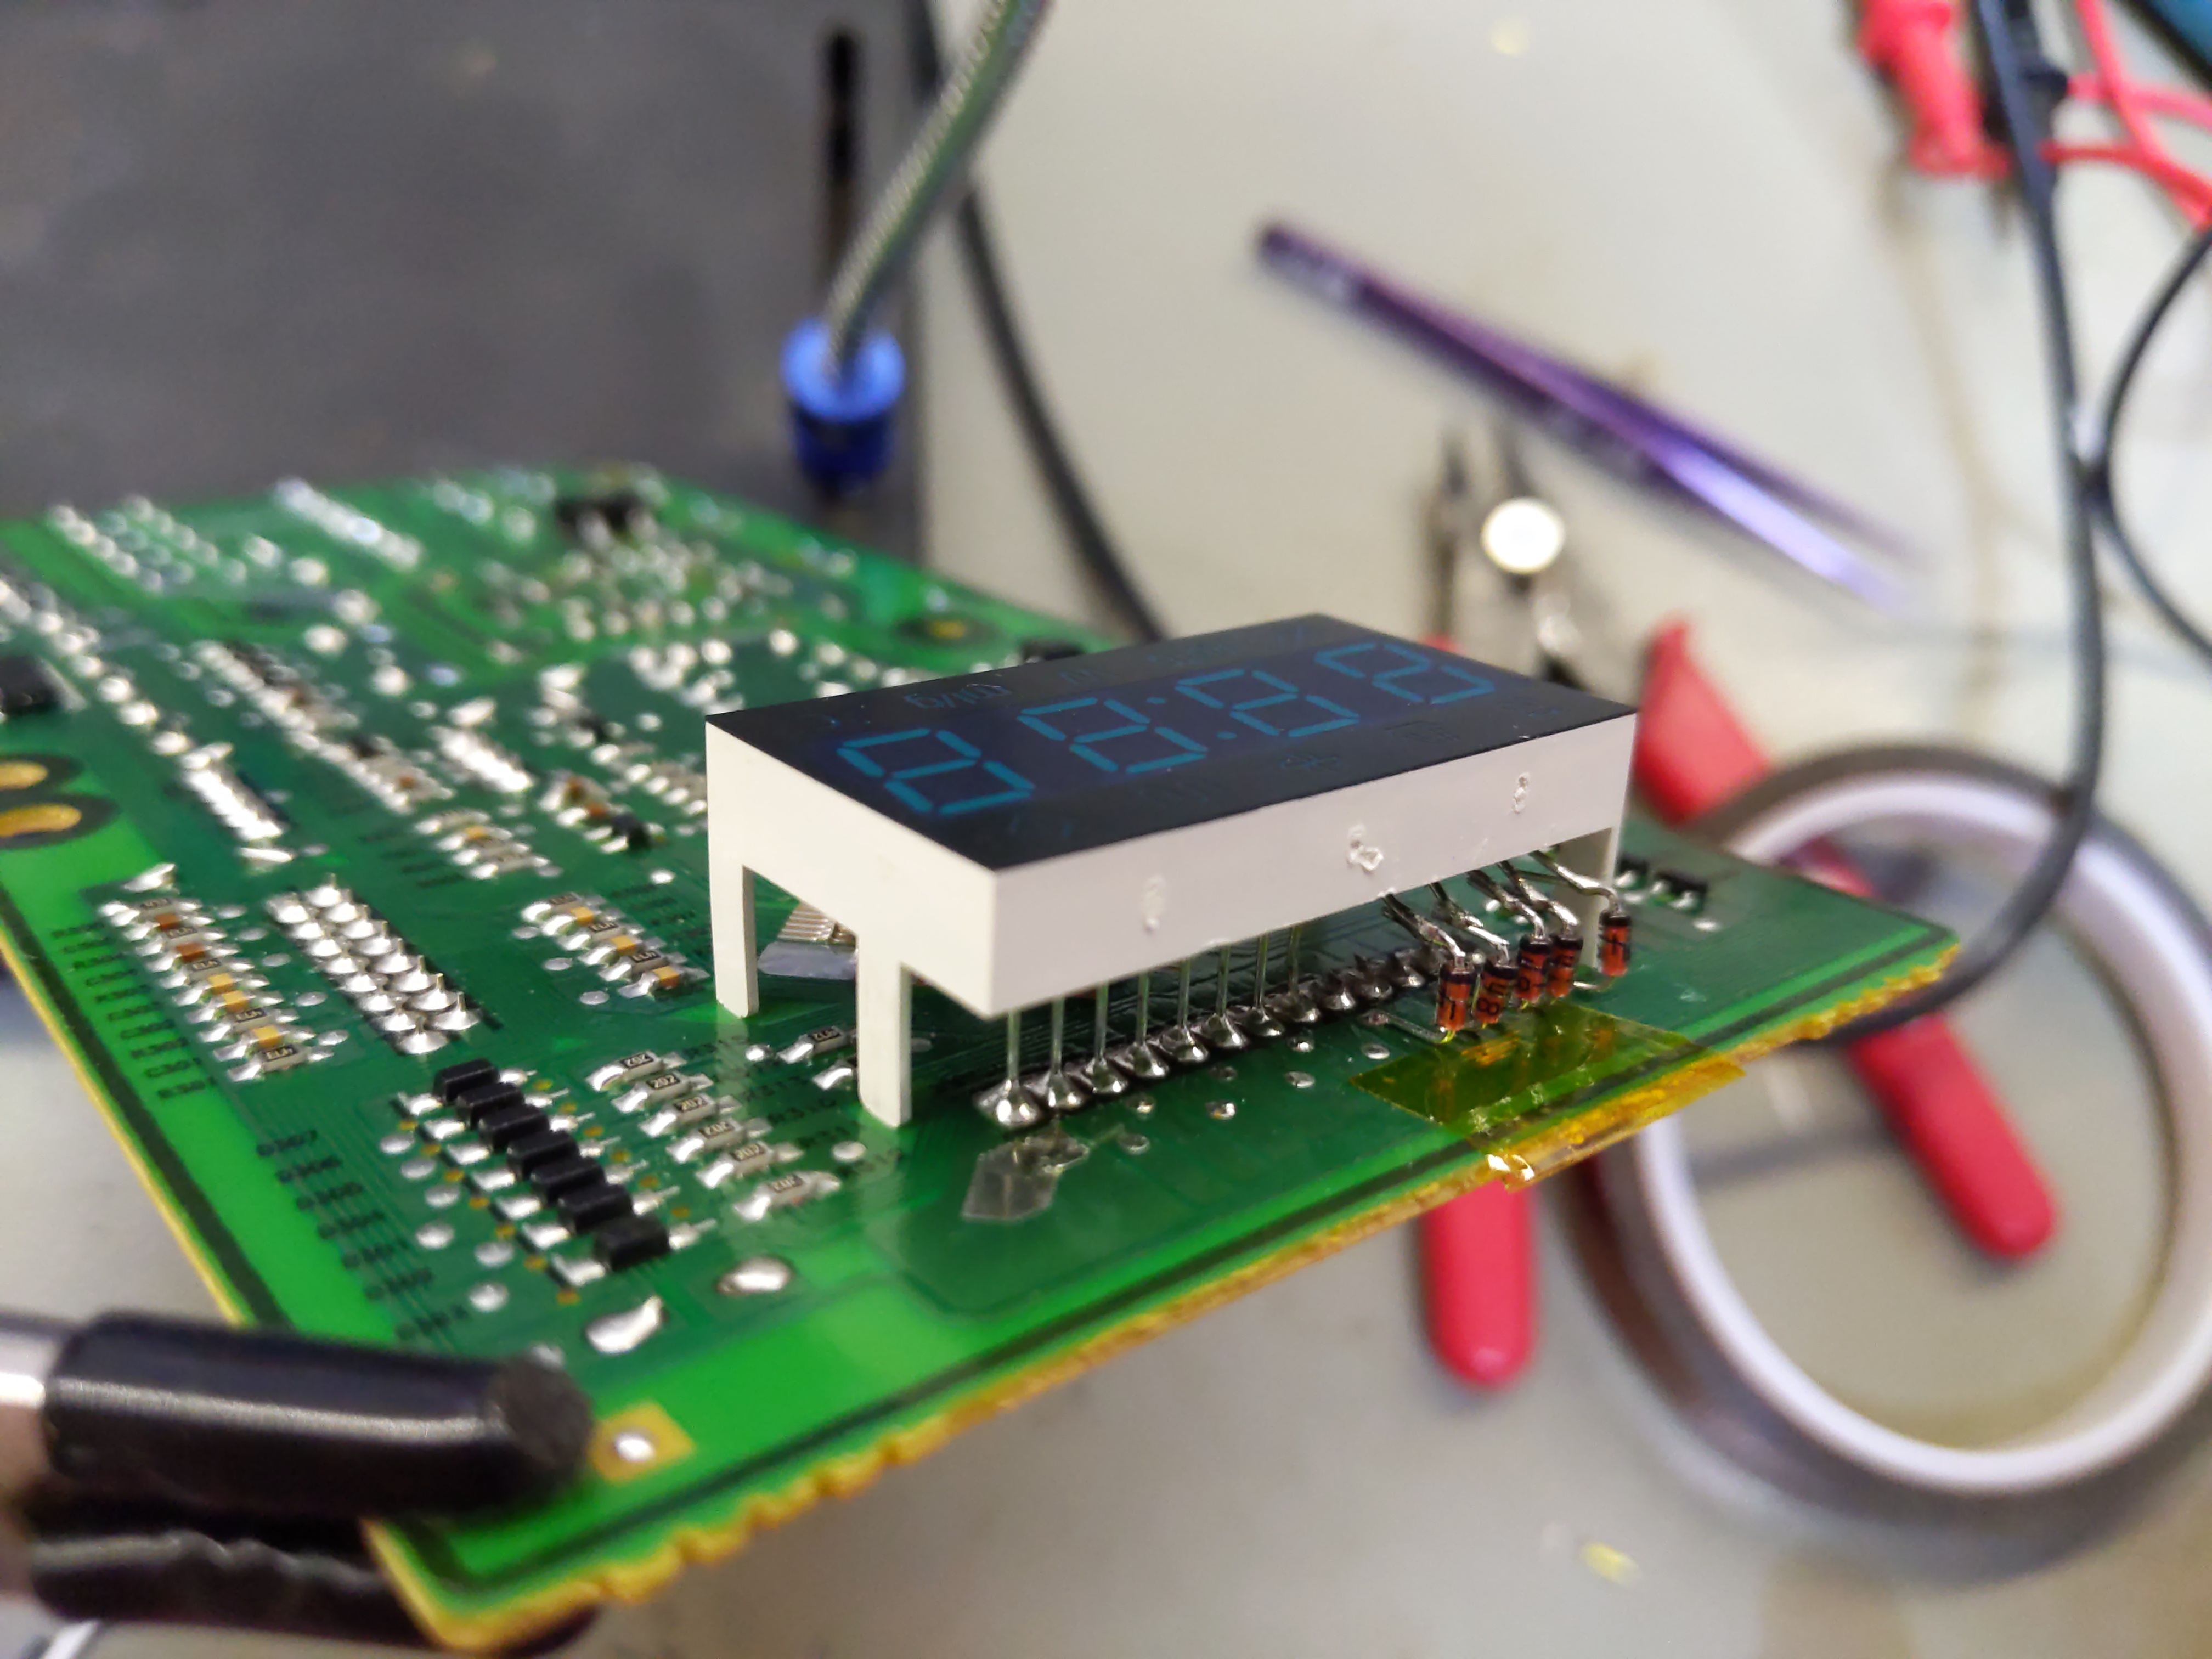
If you look carefully at the pictures the diodes are not soldered to the same big solder blob the LCD screen used, but another unused pad which is just in front. You can see more of these unused pads to the left, in front of the LCD pins which weren't cut. The pads were connected to the big solder blob where the LCD pin was snipped, so it was easier to solder to these than melting the big solder blob.
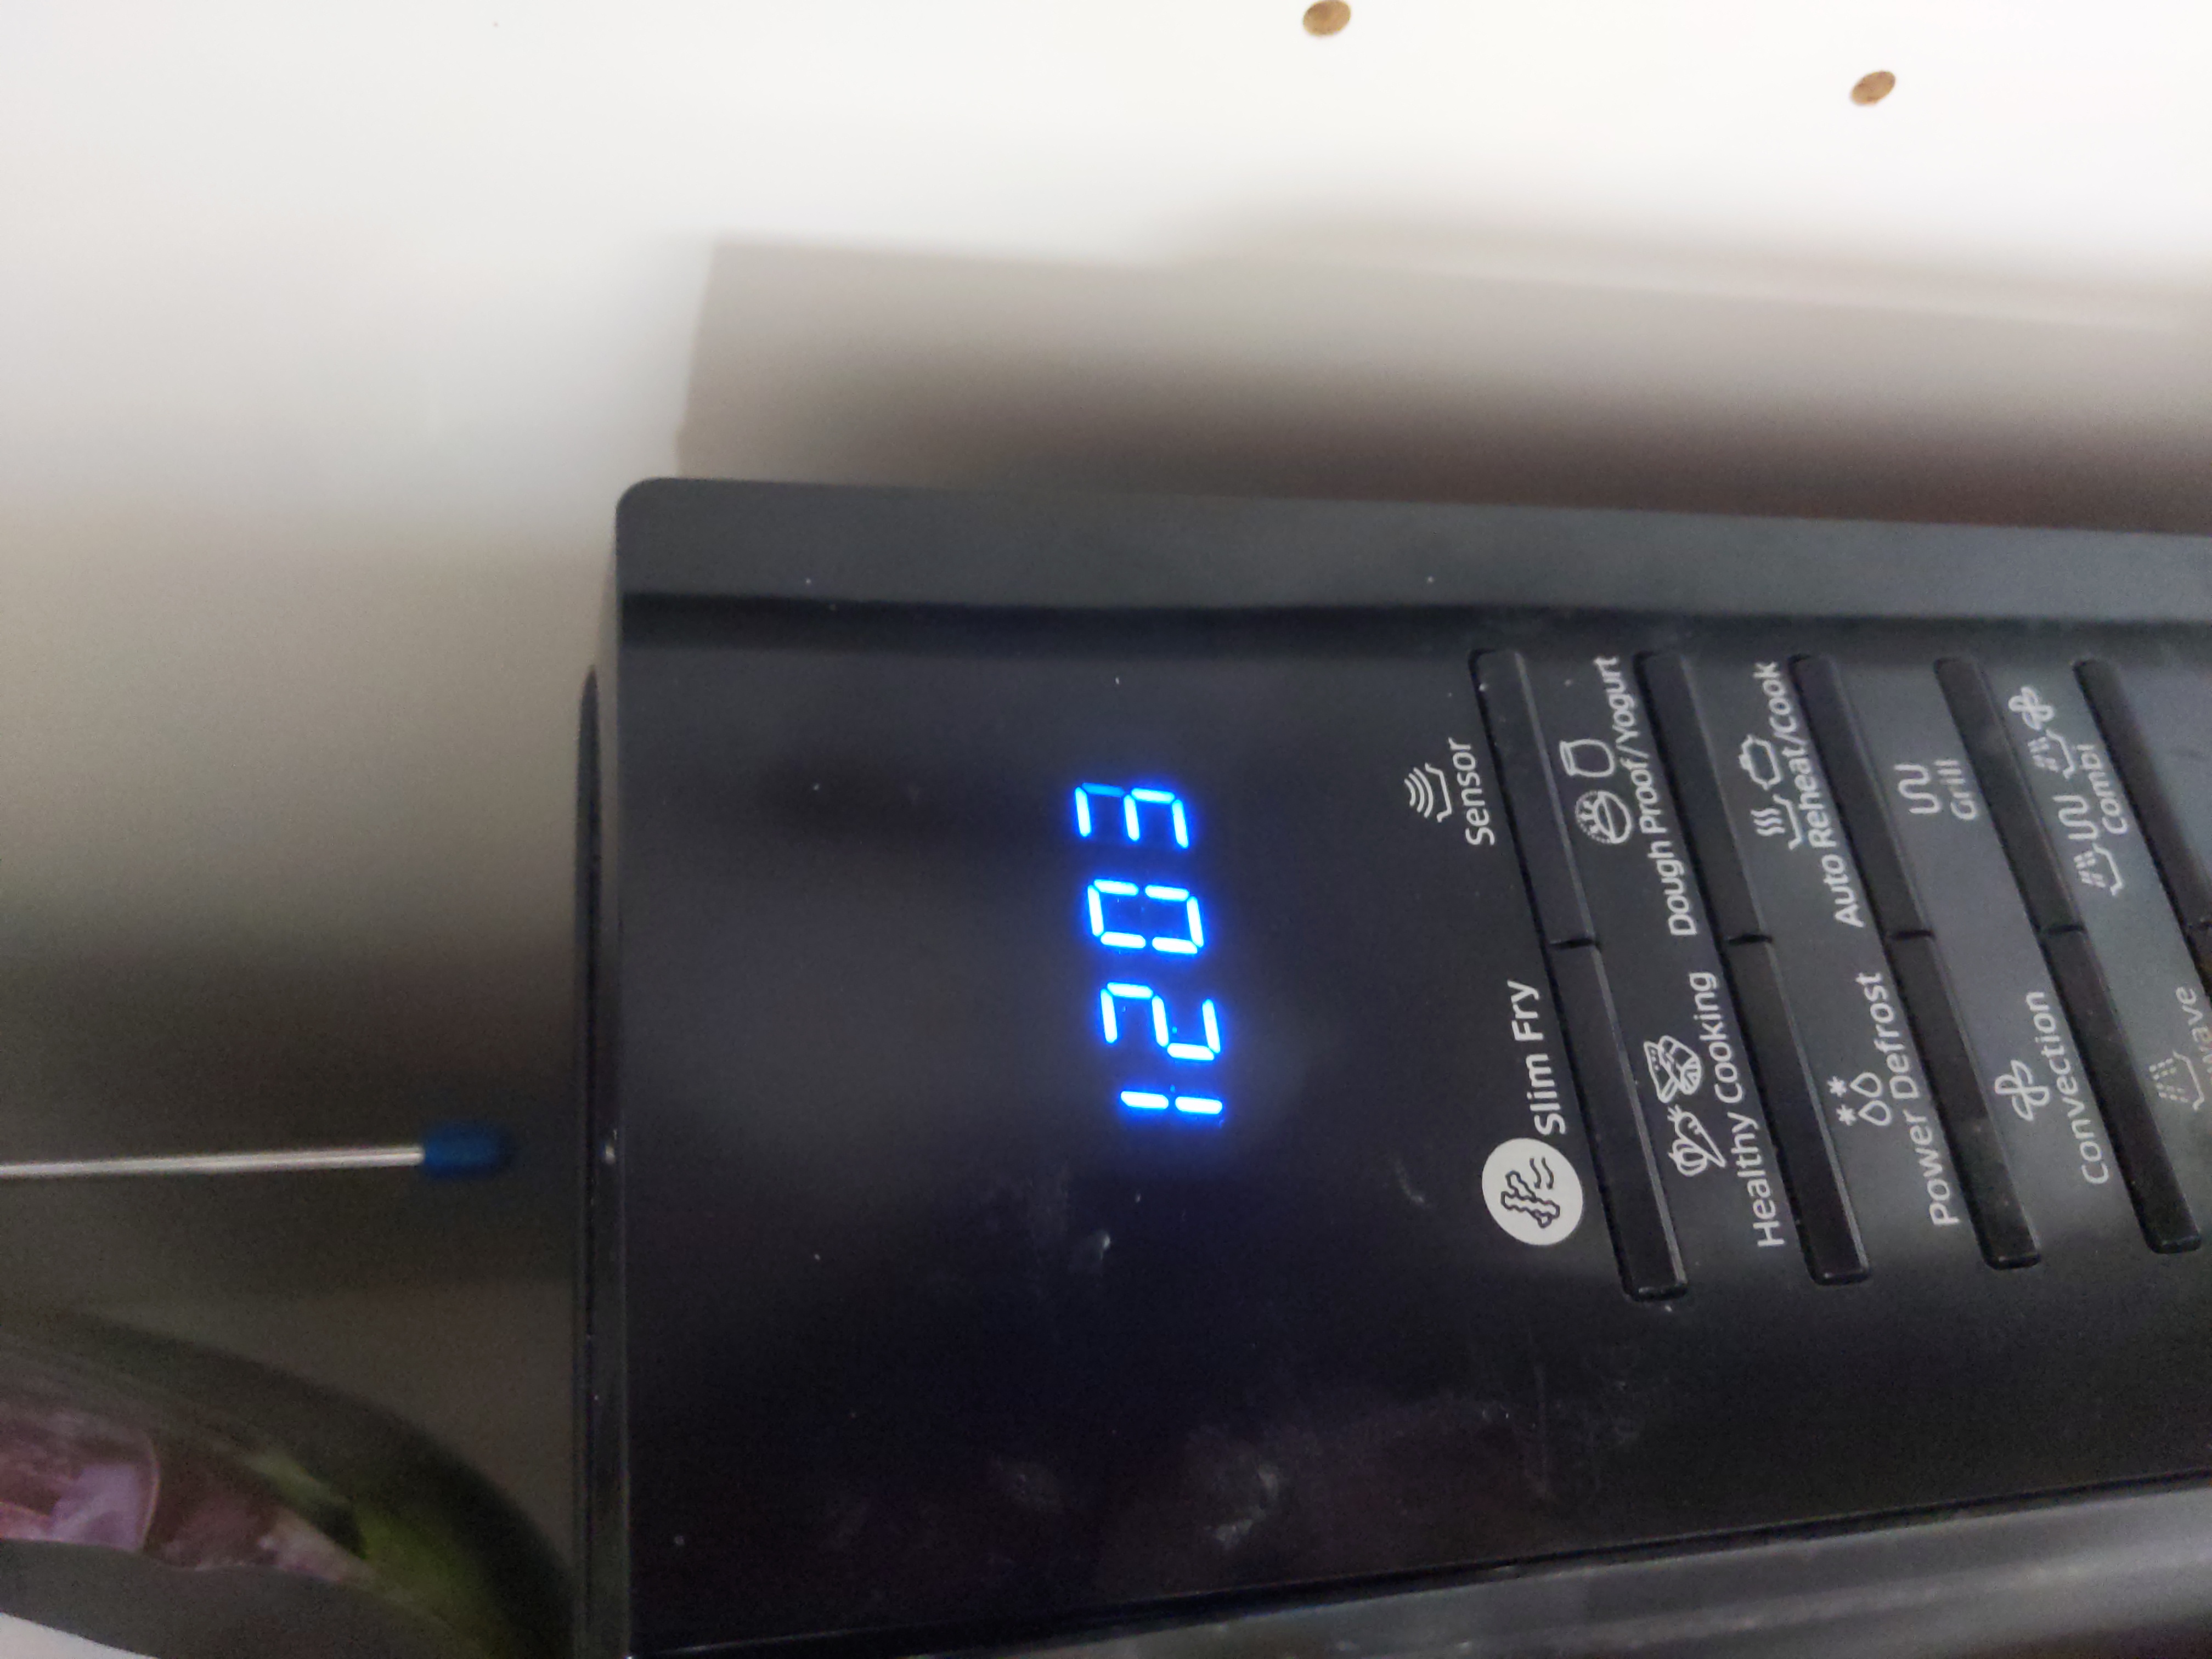
And it worked the first time round ! All the key presses registered correctly and it was back to functioning smoothly.
If you look closely at the picture above, you can see that one of the segments of the number "3" is not as bright as the rest, in the top right. So there may still be some current leakage but not enough to cause an issue. To be extra safe, I added a power strip with a switch before the microwave, and turn it off when not in use. Not sure if that will improve its longevity, but better safe than sorry.
Happy ending. Enjoyable microwave fixing. It's been about 6 months after the repair now and it's still working perfectly.